Hello.
Today, we will organize how to set up the embedded SW development environment.
This article is one of the articles that serialize the overall contents of development.
So, if you look at the previous article, I think it will be more helpful.
I will link the article below. Read it if you need to.
(Of course, there is no big problem if you just read this article.)
https://embeddedchallenge.tistory.com/529
01. What is embedded SW and what is MCU (Micro Control Unit)?
Today I will have some time to find out what is Embedded SW and what is MCU. And let’s talk about whether embedded SW really has a vision. 1. What is Embedded SW? In order to understand embedded SW, it is necessary to first understand the etymology of Em
embeddedchallenge.tistory.com
https://embeddedchallenge.tistory.com/530
02. How to purchase an embedded development board (TC275, Infineon)
Hello. Now, we are going to organize how to purchase MCU development equipment. From now on, I am going to purchase an Infineon MCU and perform embedded SW development. The link below explains the embedded SW. It might be worth taking a look at. https://em
embeddedchallenge.tistory.com
Now we will set up the embedded SW development environment.
What does it mean to set up a development environment first?
1. What does it mean to set up an embedded SW development environment?
In the first article, I explained what Embedded SW is.
Embedded SW is built-in SW, and it has been said that it is SW that enters a specific machine and performs a specific purpose.
For example, if you look at the picture below, you can see a washing machine.
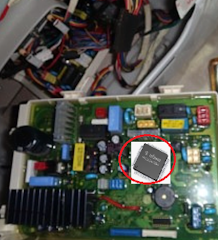
When you open this washing machine, you can see the ECU (Electric Control Board) as shown below.
This ECU plays a role in controlling specific operations of the washing machine.
You need to make SW for such a controlling action and put it in the black chip below.

So, here’s where the question arises.
How can I put SW in that black box?
The development environment must be set to put that SW in the black box.
There are two main reasons why an embedded SW development environment is needed.
(1) It is necessary to develop (make) SW and put software into that black chip.
(2) A development environment is needed to debug SW (analyzing and correcting software problems)
What is required to set up the SW development environment?
1) A source code editor is required for SW development.
You don’t have to think hard. It is possible with a program that can write text, such as notepad or notepad.
However, there are edit programs to make SW a little easier.
These are called source code editors.
Representative source code editors include SourceInsight and Sublime.
Personally, I buy and use SourceInsight with money.
Each has pros and cons, but it is better to use a tool that suits your hand.

2) It is necessary to allow the developed SW to be converted into machine language that the machine can understand.
In other words, through a program called a compiler, I change the SW I will make into machine language.

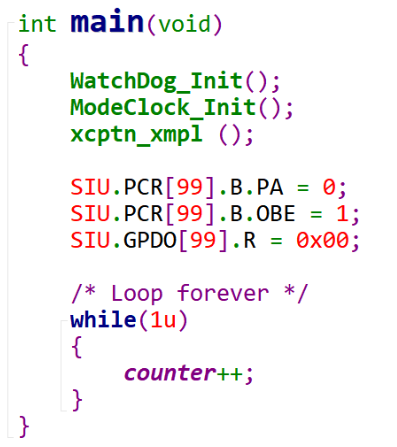
If the above main function is made into machine language through a compiler, the following binary code is created.
The values below are expressed in hexadecimal, but
If expressed in binary, it can be expressed as 01010111010101…….
The machine recognizes 01010110101 and performs the operation.

The device that performs this machine language conversion is the compiler.
The company directly purchases and uses the compiler.
Typical examples include WindRiver, Tasking, and Greenhills.
Such compilers are called cross compilers.
A cross compiler is a compiler that can produce executable code on a platform other than the one on which the compiler runs.
That is, WindRiver will be installed on your PC.
Then edit the source code on your PC and make it into a downloadable elf file through a compiler.
However, it is not executed on a laptop, but downloaded to the Flash of the MCU to be executed on another platform.
Compilers that can generate machine code that can be executed on different platforms are called cross-compilers.
3) Now you need to download the software and configure the debugging settings.
The company uses a lot of debugging tools called T32.
This is an expensive piece of equipment worth tens of thousands of dollars.
Below is what Trace32 looks like.
Connect this Trace32 to the board.
At this time, connect T32 to a line called JTAG.
T32 is a powerful debugging equipment that can download SW to MCU’s memory (Flash) and perform various debugging.

I wish I had equipment like this when I develop at home.
Unfortunately, however, it is expensive to buy at home because it is expensive equipment.
However, the board we purchased in our previous blog has a built-in debugger.
Therefore, SW download and debugging are possible through the USB communication line.
We will discuss setting and using this in detail in a later post.

Above, in order to set up the Embedded SW development environment,
1) Source code editor
2) Compiler
3) Debugging and downloading equipment
I found that I needed the above 3 things.
Companies usually use the following equipment.
1) Source Code Editor -> Source Insight
2) Compiler -> WindRiver Compiler
3) Debugging and download equipment -> T32
However, we will develop at home, and these 1) to 3) development environments can be downloaded and used in one program.
I’m going to explain how to download that device from now on.
First of all, from the conclusion, the development environment that has all the functions of 1) to 3) is called IDE (Integrated Development Environment).
2. Download Infineon IDE Environment
1) Go to the Infineon homepage and register as a member.
Below is Infineon’s homepage.
2) If you have completed the membership registration, please enter the link below.
https://www.infineon.com/cms/en/product/promopages/aurix-development-studio/
AURIX™ Development Studio - Infineon Technologies
Promopages
www.infineon.com

In fact, the HITECH compiler also exists.
However, it is recommended to download and use Aurix Development Studio.
It is convenient when first developing Aulix MCU.
Because this is a tool that can create a project including ILLD.
I will reorganize this later.
3) Now run the downloaded executable file.

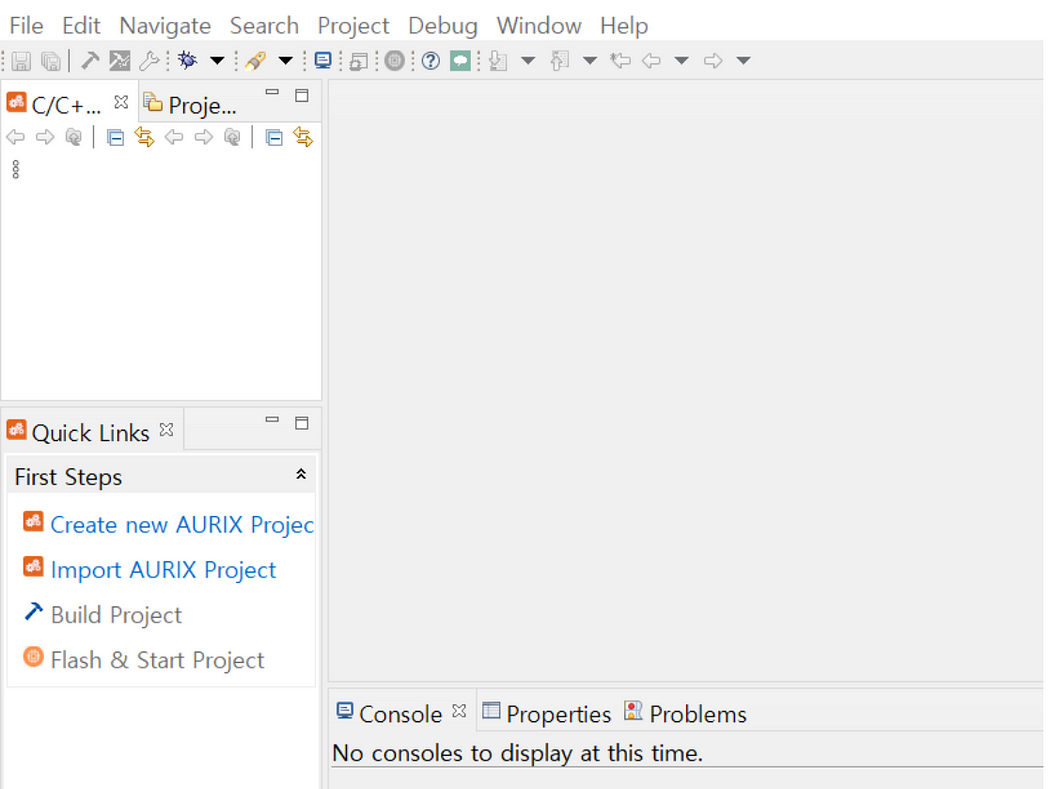
This tool is an IDE (Integrated Development Tool) that can edit, compile, download, and debug the source code mentioned above.
Now, in the next post, I will post about how to use this TOOL.
Today’s post ends with this.
Thank you.
'Embedded SW > [Infineon] TC275 English Version' 카테고리의 다른 글
| 05. Digital output settings and LED blinking using TC275 (push-pull, open drain) (0) | 2023.08.26 |
|---|---|
| 04. How to create an MCU TC275 project (Infineon) (0) | 2023.08.26 |
| 02. How to purchase an embedded development board (TC275, Infineon) (0) | 2023.08.21 |
| 01. What is embedded SW and what is MCU (Micro Control Unit)? (0) | 2023.08.20 |
| 00. Embedded SW development using TC275 (Prologue) (0) | 2023.08.20 |


댓글